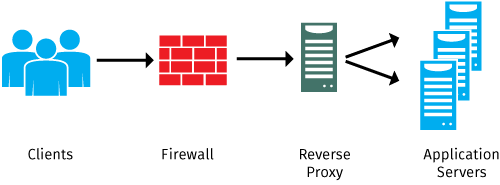
show how to configure a reverse proxy manually to provide access to several web applications through a single IP address / port.
How it works?
Web applications are usually accessible through specific ports like 80 (HTTP) or 443 (HTTPS). If you want these apps to be available on the Internet, you usually need one public IP address for each app or you can change the default ports and use NAT.

Another option is to use a reverse proxy, which allows multiple web apps to be accessed through a single IP address and port. To direct users to the correct app with just one IP address/port, a content-switching method is used based on the HTTP name of the app. Here’s how it works:
For example, you want to build workspace ONE Environment in your lab , through the router (which is the home internet router ), you cant configure a port trigger and map single IP to a specific port (HTTPS or 443 to specific IP\URL, note home router support 1:1 for port to IP), so we configure virtual service in KEMP
Consider a user attempting to access mdm.mydomain.com using HTTPS. This domain is associated with the IP address 192.168.1.5, which serves as the configured virtual service (VS) in Kemp. Within this VS, content switching is implemented along with content rules that inspect the host field in the HTTP header. These rules efficiently guide users to the specific application (Sub VS) to which the content rule is assigned. This arrangement simplifies access to various web applications using just one IP address and port..
Content rules
Connect to the Kemp Load Master and navigate to Content rules.

Then create a rule as the following screenshot. This rule tries to match the string in the header field (mdm.mydomain.com). I specified a string but you can use RegEx as well.

Create one rule for each web applications accessible through the Kemp LoadMaster.
Virtual services
Navigate to Virtual Services | View / Modify Services. Then click on Add New.

Provide an IP address, a port and a service name.

Because my services behind this VS are HTTPS, I assign a certificate and I enable the option Reencrypt to present this certificate to clients instead of the web app certificate.

In Real Servers, I click on Add SubVS to be able to manage several web apps. Create one subVS for each web apps.

Then in advanced properties, click on enable content switching.

Now if you go back to SubVS, you’ll see a column rules. Click on None to bind a content rule.

Select the content rule you want and click on back.

Once you have bound a content rule to each SubVS, click on Modify on a SubVS.
Provide a SUbVS Name and click on Set Nickname.
Then in Real Servers, click on Add New.

Provide the name or the IP address of the server that host the web application. If the web application is HA and hosted by several web servers, you can add a real server for each of them.
Also can keep the Real server check method : non

Once you have finished to configure SubVS and real server, the Virtual Service should be up:
Once the above configuration is up be sure to configure DNs records, for load balancer IP 192.168.1.5 this would get A record , for reverse proxy URLs as “ds.mydomain.com” it require CNAME record

